

Fisheye Lenses are fun to photograph with. For more history and technical information visit this Wikipedia page. Today, I want to talk about how to process photographs produced from a fisheye lens.
Earlier this week, I took a Nikon D750 digital full-frame camera and Sigma 15mm Fisheye lens to Disney’s Hollywood Studios. Started out the day riding Slinky Dog Dash in Toy Story Land.
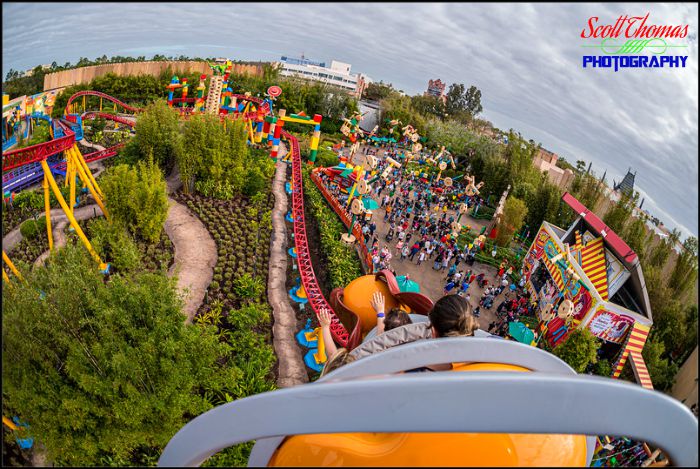
This shows the fun aspect of the Fisheye. The horizon is extremely curved in a hemispherical aspect which gets emphasized the closer subjects are to the edges.
In Adobe’s Lightroom Classic, there are tools in the Development module under the Lens Corrections tab which can enable a lens’ profile correction. After Lightroom Classic reads the image’s metadata, it will apply the correct profile to it. This process “normalizes” the image like this…

The horizon is straightened out but at a cost. The image is cropped and subjects close to any of the photo’s edges gets stretched. Sometimes it gets too distorted. In the case of the photo above, I do not think it came out too bad.
The next subject looks great as a fisheye and since the Mickey Shorts Theatre is new, the colors really popped!

Still, I wanted to see what magic the lens corrections tool would do.
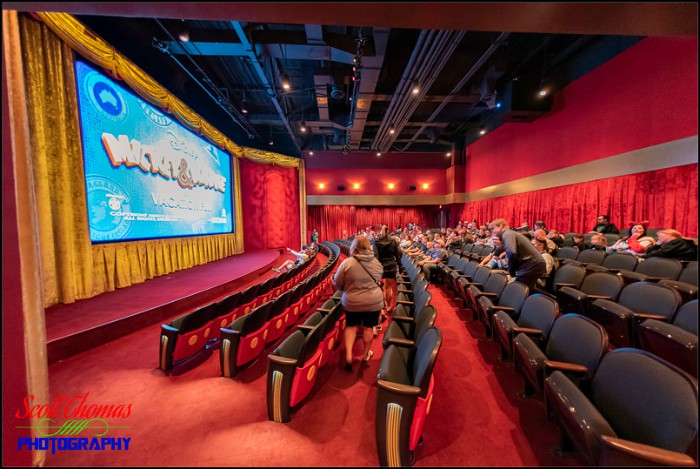
I liked it but not as much as the original. In this version of the same photo, you can really see how the correction stretches the subjects (movie screen and people seating in the last row) near the edges and leave those in the center looking normal.
In this next photo of the Lounge in ’50s Prime Time Café, the fisheye effect is a bit much for me.

In this case, the lens profile did not completely straightened the curved walls and ceiling. I then opened the Transform tool and clicked the Auto button. Bang, everything popped into place.

Most fully enabled photo editing apps have similar ways to correct a lens’ aspect. If you find, you do not like it, you can remove it. That is the huge advantage to today’s digital darkroom.
For more about Fisheye lenses, click this link: Return of the Fisheye Lens to Epcot.
Be sure to follow @allearsnet on Facebook, Instagram and Twitter!
Click below to subscribe to the AllEars® newsletter so you don’t miss any of the latest Disney news!


Trending Now
TSA just banned an essential travel item from checked luggage!
Believe it or not, it is possible to make a day at EPCOT even better!
Don't forget about this change coming up for Disney World hotel guests!
Six Flags has just announced that they're CLOSING on of their theme parks entirely this...
If you adore Butterbeer from Harry Potter as much as we do, these TWO new...
These Disneyland attractions will be closed for part of or all of May.
Each week, we search high and low for the best Disney deals on Amazon. Wanna...
We're sharing the hottest deals on LEGO sets on Amazon!
Need a new Disney tee? Get to Amazon NOW!
Only true Disney adults are packing these items for their Disney World trips!
By unanimous vote, the proposed Sunshine Corridor study is now fully funded.
The best upgrades available for Disney Cruise Line Passengers.
Epic Universe is amazing…but it does have a couple of flaws.
Here are a couple of things you'll want to get yourself because every Disney Adult...
We spotted three brand-new Disney Loungefly bags online, and one of them is already selling...
Every Disney adult is going to Amazon to buy their Disney park day shoes!
Let's talk about why every Disney Adult is buying an Oura Ring from Target right...
Many Disney guests don't realize they're breaking these rules.
These might be weird buys, but we aren't kidding when we say you'll need them...
A Universal x Minecraft experience is HERE!