

“Design is the single most important factor in creating a successful photograph. The ability to see the potential for a strong picture, then to organise the graphic elements into an effective, compelling composition has always been one of the critical skills in making photographs.” – Michael Freeman, The Photographer’s Eye
If you have not read it, I highly recommend you pick up a copy of The Photographer’s Eye. Mr. Freeman teaches how to “see” better photographs before you take them. In this post, I am going to share with you a photo from each of Walt Disney World’s parks and explain why I took them.
Starting with the Magic Kingdom’s Tangled themed restrooms found in Fantasyland. I was following my advice which I give to all who visit a Disney park: Look Up!
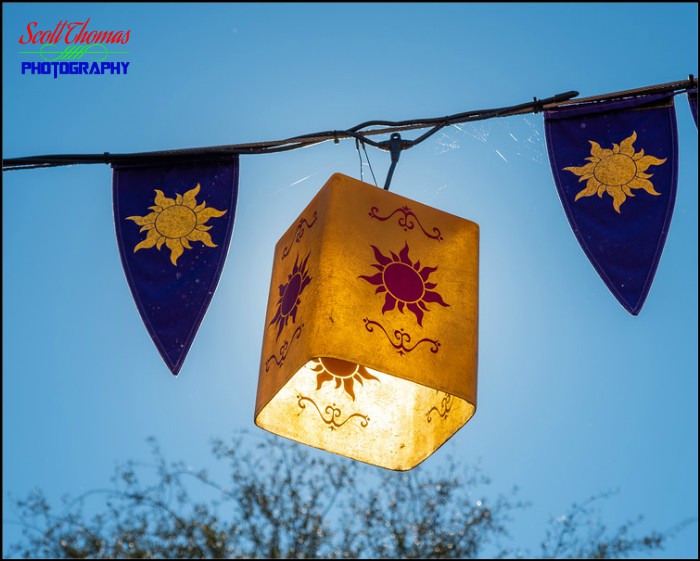
For those who have seen Tangled, you know the Sun and floating lanterns were a large part of the story. I wanted to capture the film’s significance of each by first moving my position to put the real Sun directly behind the lighted lantern. This overexposed the side facing the Sun which I recovered using Adobe’s Lightroom Classic in post-processing. I had to “dodge” the hanging Sun pennants to bring out the purple and yellow colors. It is hard to explain but having only three elements in the photo seemed to balance it out in a pleasing way.
I have photographed the Buddha statue inside the Yong Feng Shangdian Department Store in the China pavilion at Epcot’s World Showcase many times. When I was processing this one, which was in color, I thought it would look better if I found a way to highlight the Buddha by itself. I tried a few ways but found converting it to black and white got close to what I was looking for.

When photographing the Buddha, I was using the Nikon 50mm f/1.8 lens (aka Nifty-Fifty) so I had to be careful with the aperture to get enough depth of field. Closing it down two stops from wide open did the trick.
After converting it to black and white, I cropped it from the original to an 8×10 ratio which further put the focus on the statue. I then added a large, dark vignette to further highlight it. I gave it a good dose of clarity and dodged in extra exposure to pull out the statue’s details.
When I came upon this Lion statue prop in the Backlot Express at Disney’s Hollywood Studios, I knew I needed to separate it from the busy background of guests, tables and the rest of the restaurant’s dining area.
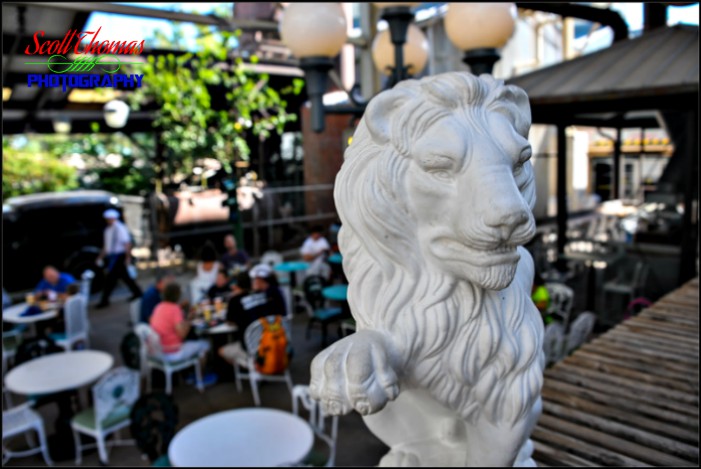
The best way was to use Selective Focus with an aperture set to capture the prop in sharp focus but to let the background go into soft focus. This gives the image an almost 3-D effect. In this case, f/5.6 was the best aperture to give me the effect I was looking for. How did I determine that? On most SLR cameras, there is a Preview button which stops down the aperture so you can see it in the viewfinder.
In this last photo taken on the Kilimanjaro Safari in Disney’s Animal Kingdom, I noticed how the light and shadow from the sunlight played across the plant’s fronds.

It helped a lot that the background was in dark shadow which further highlighted the plant’s pattern.
In each of these photographs, I recognized the elements and used photographic techniques both before and after I pressed the shutter. I then processed them using my Photographer’s Eye.
If you would like to purchase The Photographer’s Eye click HERE.
How do you look for photos with your Photographer’s Eye?
Be sure to follow @allearsnet on Facebook, Instagram and Twitter!
Click below to subscribe to the AllEars® newsletter so you don’t miss any of the latest Disney news!


Thanks for the book recommendation. I haven’t read it, but my teenage daughter is starting to get into photography, and I’ve been trying to get her to not just snap a picture, but to look at the composition of the picture she wants to take and to try different angles, distances, etc. This might be a good book for her (and me)!
And Disney World is great for finding things to photograph and to play around with different composition.
It is a great book for both of you. Wish I had had it when I first got serious about photography.